
192.168.1.1 is a private IP address commonly used to access a router’s admin panel. This IP address is often set by default by router manufacturers as the gateway address, allowing users to log in and configure various router settings.
How to Login to 192.168.1.1?
To login into router’s admin panel 192.168.1.1, you can follow these steps:
- Enter 192.168.1.1 into the address bar of your browser or click here http://192.168.1.1.
- A login page will prompt asking you to enter login username and password.
- Enter router username and password in the corresponding fields.
- If the login credentials are correct, you will log in to the Admin Panel of the router.
Note: If you have trouble accessing the login page at 192.168.1.1, make sure that your device is properly connected to the network. Or you can try to use a different IP address: 192.168.0.1 or 10.0.0.1.
Forgot Router Username and Password?
If you forget your router’s login username and password, follow these steps:
- Check setup documents or emails for default login details, or check this default username and password list.
- Try common combinations like “admin/admin” or “admin/password”.
- If all else fails, try to factory reset your router. Press and hold the RESET button (usually at the back or bottom) for 10-30 seconds. This erases custom settings and restores default credentials. You’ll need to reconfigure your network after the reset.
How to Change Router IP Address?
The default gateway IP address is assigned by your internet service provider, but you can change it to suit your needs. Changing the IP address can enhance security by blocking unauthorized access, preventing DDoS attacks, and adding an extra layer of protection. Here’s how to do it:
TP-Link:
- Open a web browser and enter the router’s default IP (e.g., 192.168.1.1 or 192.168.0.1.
- Log in with the router’s username and password, try “admin/admin”.
- Go to the menu Advanced settings > Network > LAN.
- Change the IP address to the desired new one in the “IP Address” field, such as 192.168.1.2.

- Click “Save” and reboot the router to apply the changes.
Linksys:
- Login to your Linksys router via a web browser, enter the default IP address (usually 192.168.1.1).
- Enter router username and password: admin/admin.
- Navigate to the “Setup” tab, then select “Network Setup.”
- Under the “Static IP” menu, change the “Router IP” to your desired address.
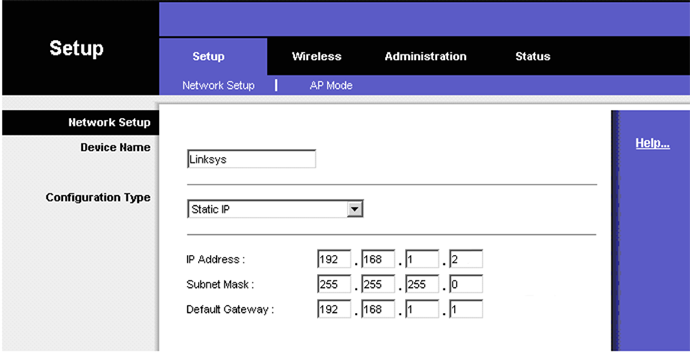
- Save settings and reboot the router.
Netgear:
- Log in to your NetGear router admin page by entering 192.168.1.1 or 192.168.0.1 in your browser. You can also access it via www.routerlogin.net or www.routerlogin.com.
- Use
adminas the username andpasswordas the password by default. - Once logged in, go to the Advanced tab.
- In the left-side menu, select “Setup,” then click on LAN Setup.
- Under LAN TCP/IP Setup, find the IP Address field and change it to your preferred IP address.
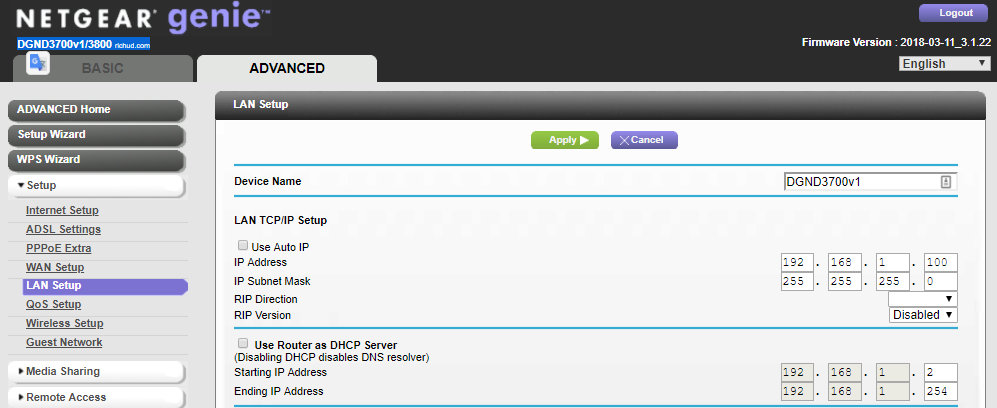
- Apply the changes, then reboot the router to update the settings.
After rebooting, ensure all connected devices are updated with the new IP address to maintain network connectivity. If any device fails to reconnect or the network has issues, you can reset the router to its default factory settings. This will revert all customized settings.
How to find your router’s IP address?
If you are having trouble accessing your router using 192.168.1.1 you can try different IP addresses. Other commonly used IP addresses are 192.168.0.1, 10.0.0.0.1 or 192.168.2.1. To find the IP address used by your router, look at the router IP address list. You can also read the how to find your router’s ip address tutorial.